Apply Stamps
|
Step 1 |
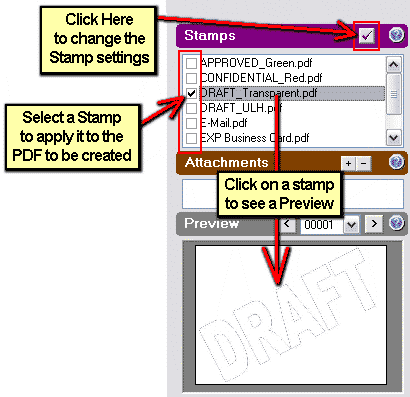
Click on a Stamp's Checkmark to apply the Stamp to the Output PDF.
|
|
Step 2 |
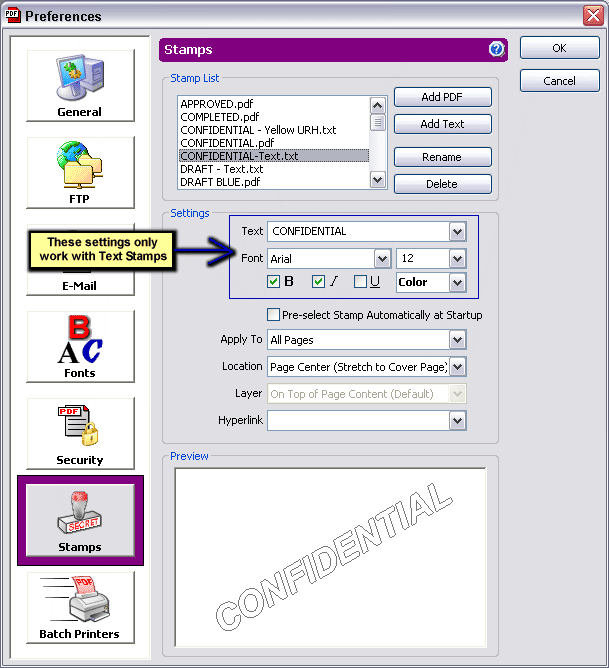
Click on the Checkmark Button to Change the Stamp Settings. Pre-select Stamp: This will ensure that this stamp is always selected every time PDF reDirect Pro starts Apply to: Use this to choose which page(s) the stamp will be applied to. Alternatively, a stamp can be placed in it's own page (useful for a standard cover page, or for a company logo. Location of the stamp: Stamps can be placed at any corner or in the center. Layer: Stamps can be placed on top or underneath* of page content. *WARNING: Some programs place a non-transparent white box covering the entire page: therefore, the stamp will be invisible if placed underneath. For example, Powerpoint does this. Hyperlinks: A hyperlink can be associated with a stamp which points to an e-mail address, an ftp folder or a website. |
|
Step 3 |
Click on "Save" to create the PDF with the Stamps applied. |
Creating New Stamps
|
Step 1 |
Create a New Stamp You can create two types of stamps, either a Text Only Stamp or a PDF Stamp. A Text Only Stamp is faster to create and more flexible as you can use special characters to show the page number or who created the PDF, but the PDF stamp can be made to be more attractive as it can contain graphics as well.
|
|
|